The TL;DR List of things I did to get things running:
- Made sure to use the Android Phoenix LCD Image
- Made sure the Phoenix Image is correct on the SD Card
- Made sure I used a legit 5V\2A power supply
- The ribbon connections are finicky. If you are afraid to ask like I was, pins side down.
- Sanity check with a Linux build on HDMI
- The LCD Android build seems to work on HDMI or on the LCD, but not both. If the LCD is connected correctly, HDMI doesn't appear to work.
- First boot takes a while, successive boots are very fast
2016-July Update. Instead of the link in Step #1, bookmark the Android releases link and scroll down to the LCD version. This way, you will always get to the latest.
As of the 2016-06-03 release, "dd" images for the Android LCD Builds are available! You don't have to use Phoenix Imager (though there is still an image for that), you can use something like Win32DiskImager, or the dd utility on OSX or Linux.
The Image
If you don't have 2 SD Cards yet, just do it, you will want to test your sanity on other builds and having to rewrite back and forth over the same card takes forever. For the LCD to work you have to use Android 5.1.1 LCD PANEL . Phoenix Card images are specifically for setting up Android images on SD Cards, and as far as I can tell, you can't do these with Linux dd or Win32DiskImager, you need to use this specific burner. The only one I was able to get working for me was the Windows version, the Mac LiveSuit didn't seem to work the same way. While the Phoenix application is straightforward enough, I did have a couple of inexplicable failures, as well as at least one run that said it worked but did not do anything but make one 50MB partition. It should take a few minutes, but it was a lot faster than a linux image, because it writes a lot less. This was what my working Android image looked like when it was done:
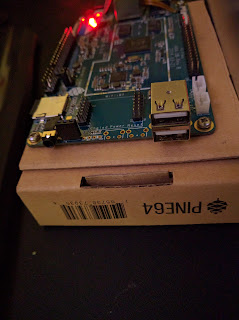
For my first Android Image failure, nothing at all seemed to work. I verified I had a 5V\2A supply (yes, of course I first tried on the nearest free micro USB plug I saw). No HDMI, LCD, anything. I started thinking I had a bad board. To ease my mind, I disconnected everything, and burned an the Arch Linux distro using reliable old Win32DiskImager. On HDMI, everything came up fine. At least I knew the board was good! With a little renewed confidence I popped out my latest SD Card burned from Phoenix Image, and got ready to reconnect the LCD. In my initial haste of receiving the board, I just tried connecting everything, but the ribbon cables make it tricky to get to the board while testing the LCD. In the laziest and most cost effective solution available, requiring only some masking tape and 4 small self-threading screws (which you should have somewhere if you just got a Pine64), I hacked this together:
- Cut the top off the Pine64 Box
- Flipped over the box
- Mounted the Board onto the box top + bottom with 4 threading screws
- Applied a loop of masking tape to the front of the box
- Stuck the LCD to the masking tape
No, not a great permanent solution, and sure, I can see the fire hazard, but for tweaking and testing it worked for me! This put the LCD in a good position that it could reach both the DSI and TS ports without getting stretched, and the weight of everything made the touch screen usable and sturdy enough for swiping and typing and tapping.
On my first try, the LCD didn't come up. I figured I would try HDMI. There it was! Not usable, as the touch screen did work (on the blank LCD, halfway there), but it wasn't really usable against my monitor of a different resolution. Finally I re-seated all of the LCD connections. I found that the easiest way to go is to connect the bus to the LCD ribbon, then the long ribbon to the bus, and finally the ribbon to the port. If you were wondering, the ribbon side with the pins faces down on all of the ports - when you close them they sort of look like they could be upside-down, but I definitely have everything pins-down. I guess in the end I just didn't have a completely clean connection, after a few reboots, it all started to work!
On one of my reboots, this just hung. Every other time, the above screen was around 5s. If this is up for more than 30 seconds, reset or power cycle. After this screen, you will see:
Next, I'll give the camera a try, and see what I can do with the temp\humidity and light sensors. The buses on the sensors don't fit anything directly, so will need to do a little hacking.
This is certainly more challenging than a Raspberry Pi build, I have always run Linux on my Udoo so I don't know if you run into the same Android problems with that, but this seems to be a great first release which can only improve with time.


